
1、在Eclipse中安装SonarQube插件
Go to Help > Eclipse Marketplace... and search for "SonarQube"
orGo to Help > Install New Software... This should display the Install dialog box. Paste the Update Site URL ( the latest version or for previous ones) into the field Work with and press Enter. This should display the list of available plugins and components: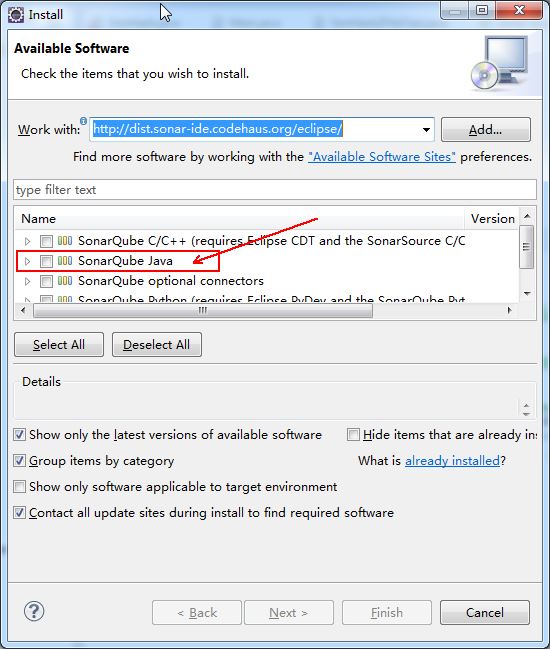
安装成功后
2、在Eclipse中配置SonarQube
1)、在项目根目录底下,配置sonar-project.properties文件
# Required metadatasonar.projectKey=nutch-keysonar.projectName=nutch-prjsonar.projectVersion=1.0# Path to the parent source code directory.# Path is relative to the sonar-project.properties file. Replace "\" by "/" on Windows.# Since SonarQube 4.2, this property is optional. If not set, SonarQube starts looking for source code# from the directory containing the sonar-project.properties file.sonar.sources=src# Encoding of the source codesonar.sourceEncoding=UTF-8# Additional parameterssonar.my.property=value
注意:sonar.projectKey、sonar.projectName这两个属性的值,应当根据Sonar Web中我们指定的值而定。
如果是第一次在Eclipse中分析项目,并且没有直接用sonar-runner命令分析过项目。
我们需要在Sonar Web中做关于sonar.projectKey、sonar.projectName的一些配置,配置情况如图所示:

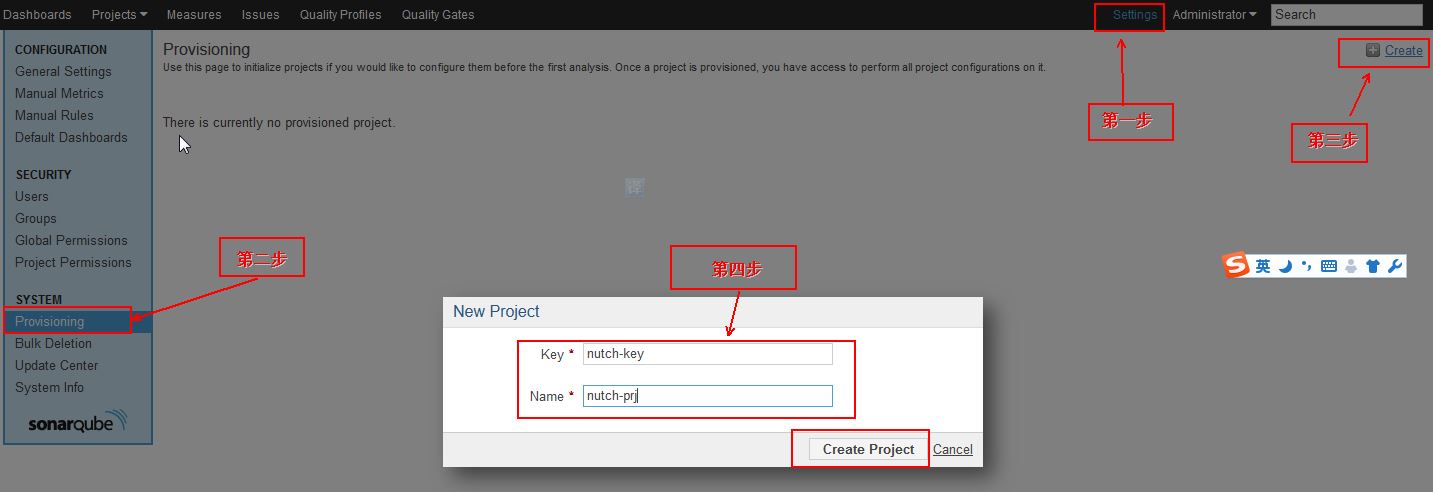
创建key和project成功后,我们进行下面的配置:
2)、Go to Window > Preferences > SonarQube > Servers.
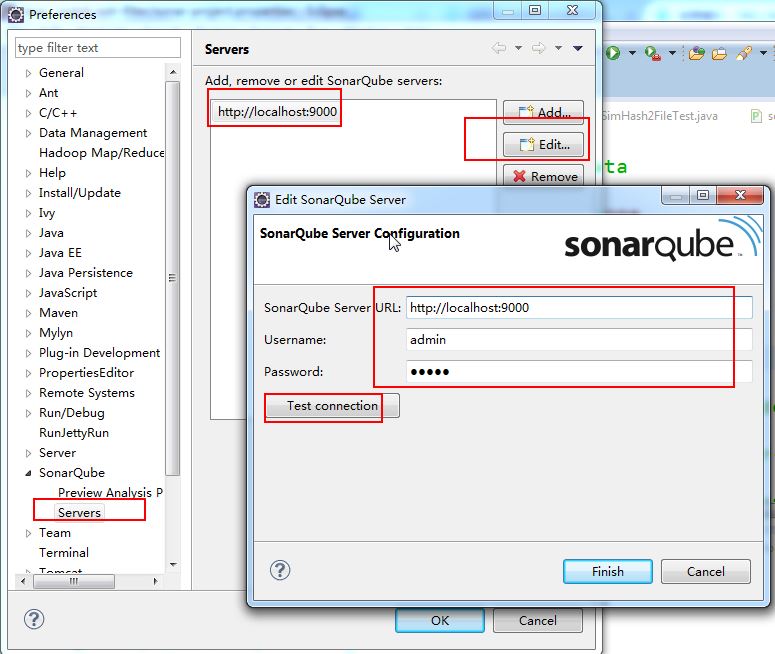
3)、Configure -> Associate with SonarQube
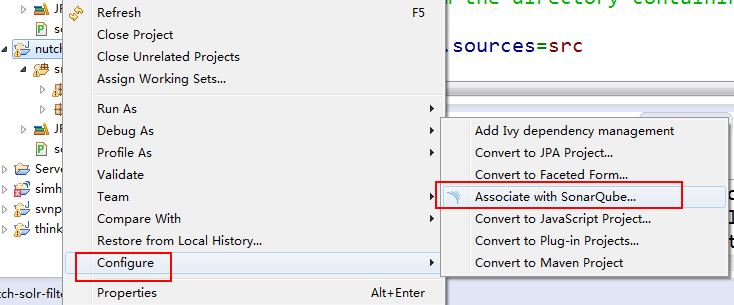
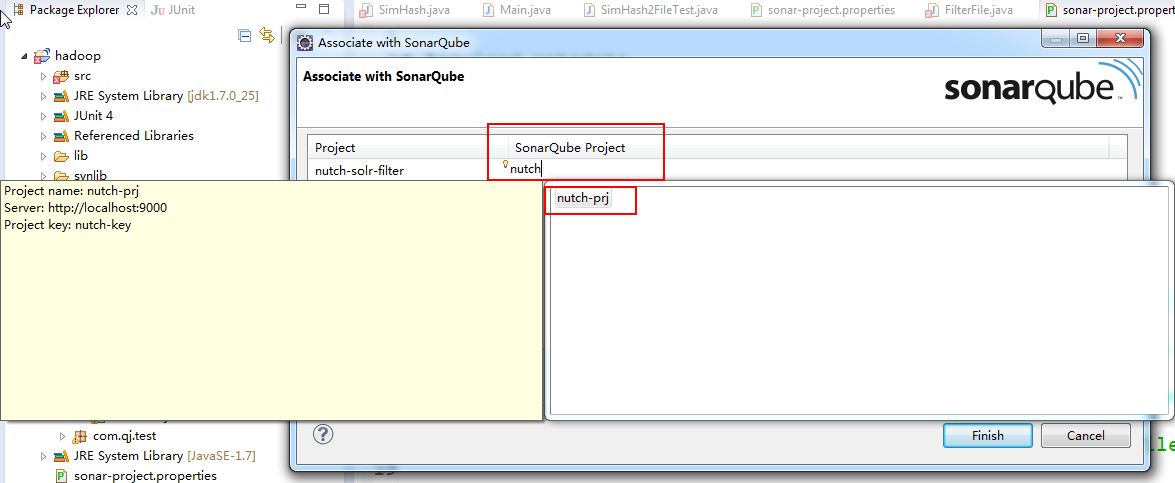
4)、配置完成后,sonar-runner开始运行,但是,我们会发现,控制台报错,出现错误信息为:
Project not found on remote SonarQube server [nutch-key]
5)、单击右键选择SonarQube -> Change Project Association,我们会发现,之前我们配置的SonarQube Project,并未配置成功。
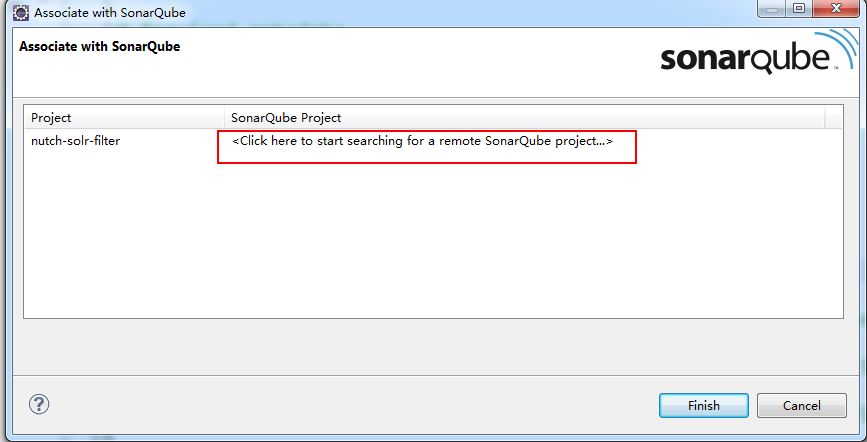
3、配置失败后解决方案
出现上述失败后,我们需要首先通过 》这篇文章中的方法分析项目成功后,才能在Eclipse中使用插件成功。
在项目所在目录下运行sonar-runner命令
E:\qjay\wrokespace2013\nutch-solr-filter>sonar-runner -e
成功后,我们可以访问查看分析结果4、在第3步成功后,我们再重新做第2步中的第5)小步
在Sonar Project中添加nutch-prj,此时我们会发现可以添加成功(因为现在nutch-prj才真实的存在了)。
5、添加成功后,点击SonarQube -> Analyze,分析项目,现在可以分析成功了
我们可以单击右键选择SonarQube -> Open in SonarQube Server,在Eclipse中查看分析结果。

感悟:
经过Eclipse中安装SonarRunner插件,给我的感觉是,没太大实际意义。
不知道是我在Eclipse中配置插件的方法不对还是怎么了,为什么非要在控制台使用命令分析项目成功后,才能在Eclipse中正确连接Sonar Web,并且才能正确分析项目呢?
既然我们在控制台利用命令就能分析成功,那么我们还需要在Eclipse中安装SonarQube插件干什么呢?
所以,我觉得其实在Eclipse中安装SonarQube插件分析项目的意义不是太大。